
What if you could move from first prompt to pull request without manually piecing together context across multiple tools?
Now that the app is installed and connected to the course repository, this chapter answers why the desktop app helps if you already use GitHub Copilot in an editor or terminal. Then you’ll tour the main navigation and compare chats with project sessions. You’ll also learn how session modes control how much the agent does on its own, how to choose a model and reasoning effort, and where to find the app settings.
Learning Objectives
By the end of this chapter, you’ll be able to:
- Explain why you should use the GitHub Copilot app compared to using Copilot in an editor or Copilot CLI in the terminal
- Identify key app features and settings
- Choose between a chat and a project session for a task
- Explain the session modes: Interactive, Plan, and Autopilot
- Select a model and reasoning effort based on task complexity
- Optionally try voice dictation
⏱️ Estimated Time: ~30 minutes
Prerequisites
If you jumped straight here, pause and complete Chapter 00: Setup to install the app and connect your repository.
Why Use the GitHub Copilot app?
If you already use GitHub Copilot in VS Code or use Copilot CLI in the terminal, why bother with a separate app?
GitHub Copilot in the editor or terminal is excellent next to the code you already have open. The harder part is supervising agent work end to end: planning, isolated edits, tests, previews, issues, and pull requests. When that work is spread across tools, you have to piece the story together yourself and ask “where was I?”
The app does not replace your editor. It gives you a single desktop control center to run and review agent work:
| Challenge | What it feels like | What the Copilot app adds |
|---|---|---|
| Shared working copy | Two agent tasks touch the same folder and branch, and the changes blur together | Project sessions keep focused work separate (Chapter 02 explains worktrees) |
| Scattered evidence | Plan in chat, diff in the editor, tests in a terminal, PR in the browser | Sessions, diffs, terminal output, browser previews, and GitHub work in one app |
| Explore versus change | A quick question and a real code change feel the same until files start changing | Chats for safe questions; project sessions when you are ready to work in a repo |
| Progress buried in chat | Plan steps, checks, and notes scroll away in a long chat thread, so you keep asking the agent where things stand | Canvases give you and the agent a shared board in the side panel that you both update (Chapter 06 covers canvases) |
| Repeat work | You retype the same prompt every week for PR summaries, checks, or cleanup | Automations save a prompt and run it on demand, on a schedule, or from GitHub events |
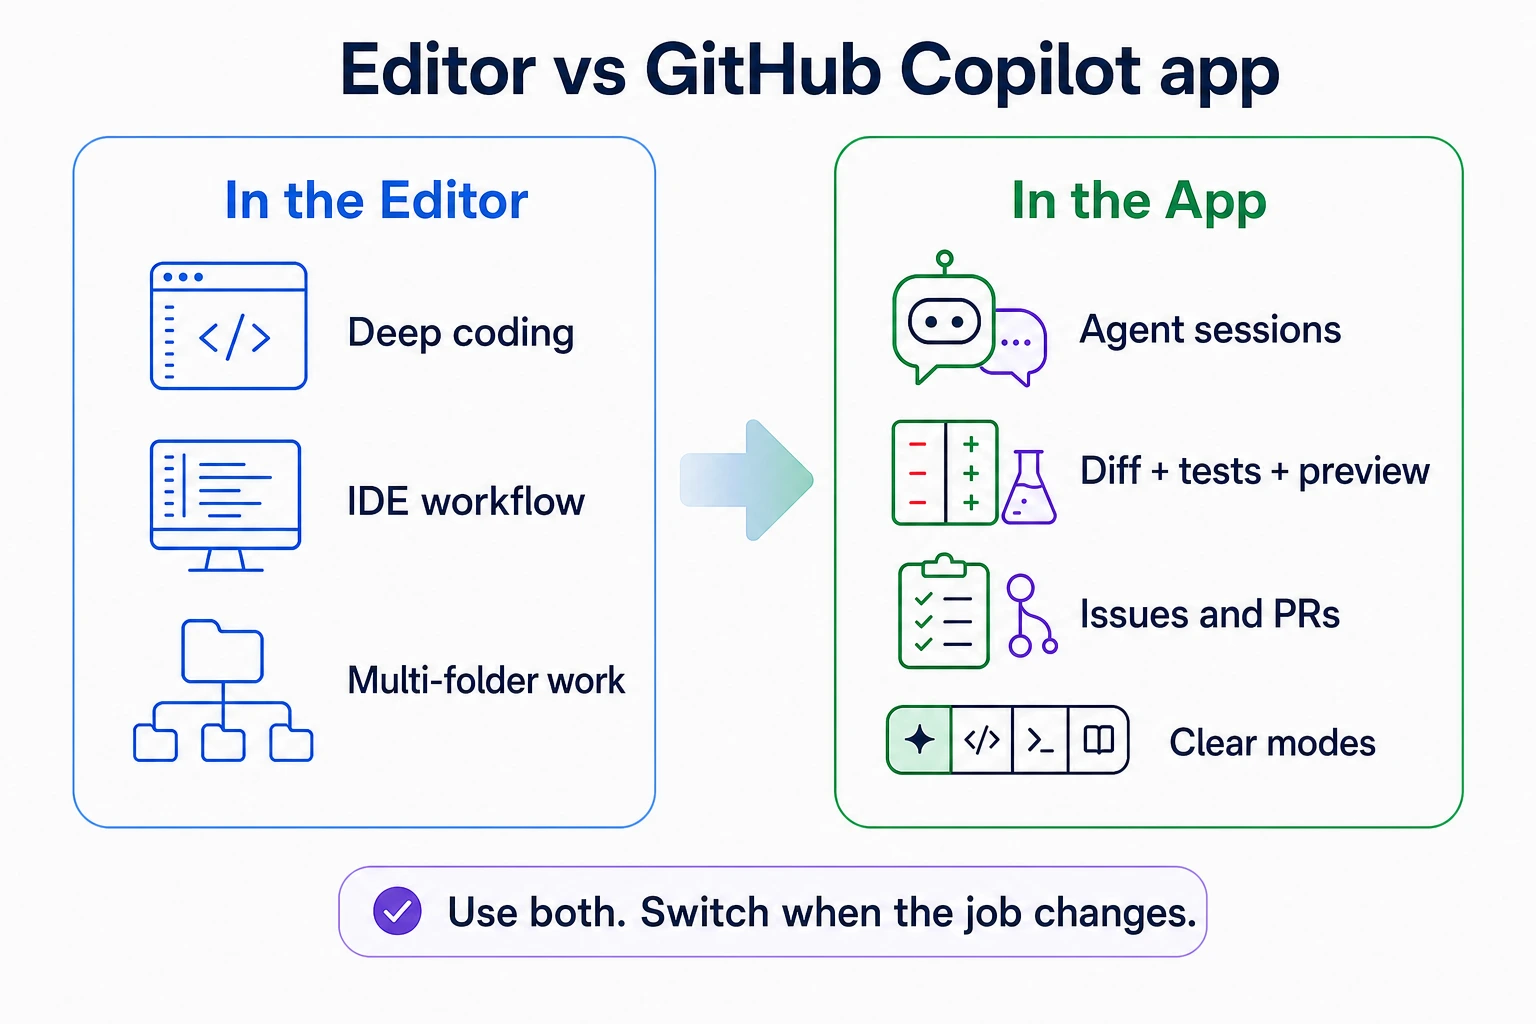
Keep VS Code, Visual Studio, JetBrains, or your usual editor for deep editing. From the app, you can open the same project in VS Code any time you want a full editor.
Tour the App
Open the GitHub Copilot app and notice these areas in the sidebar:
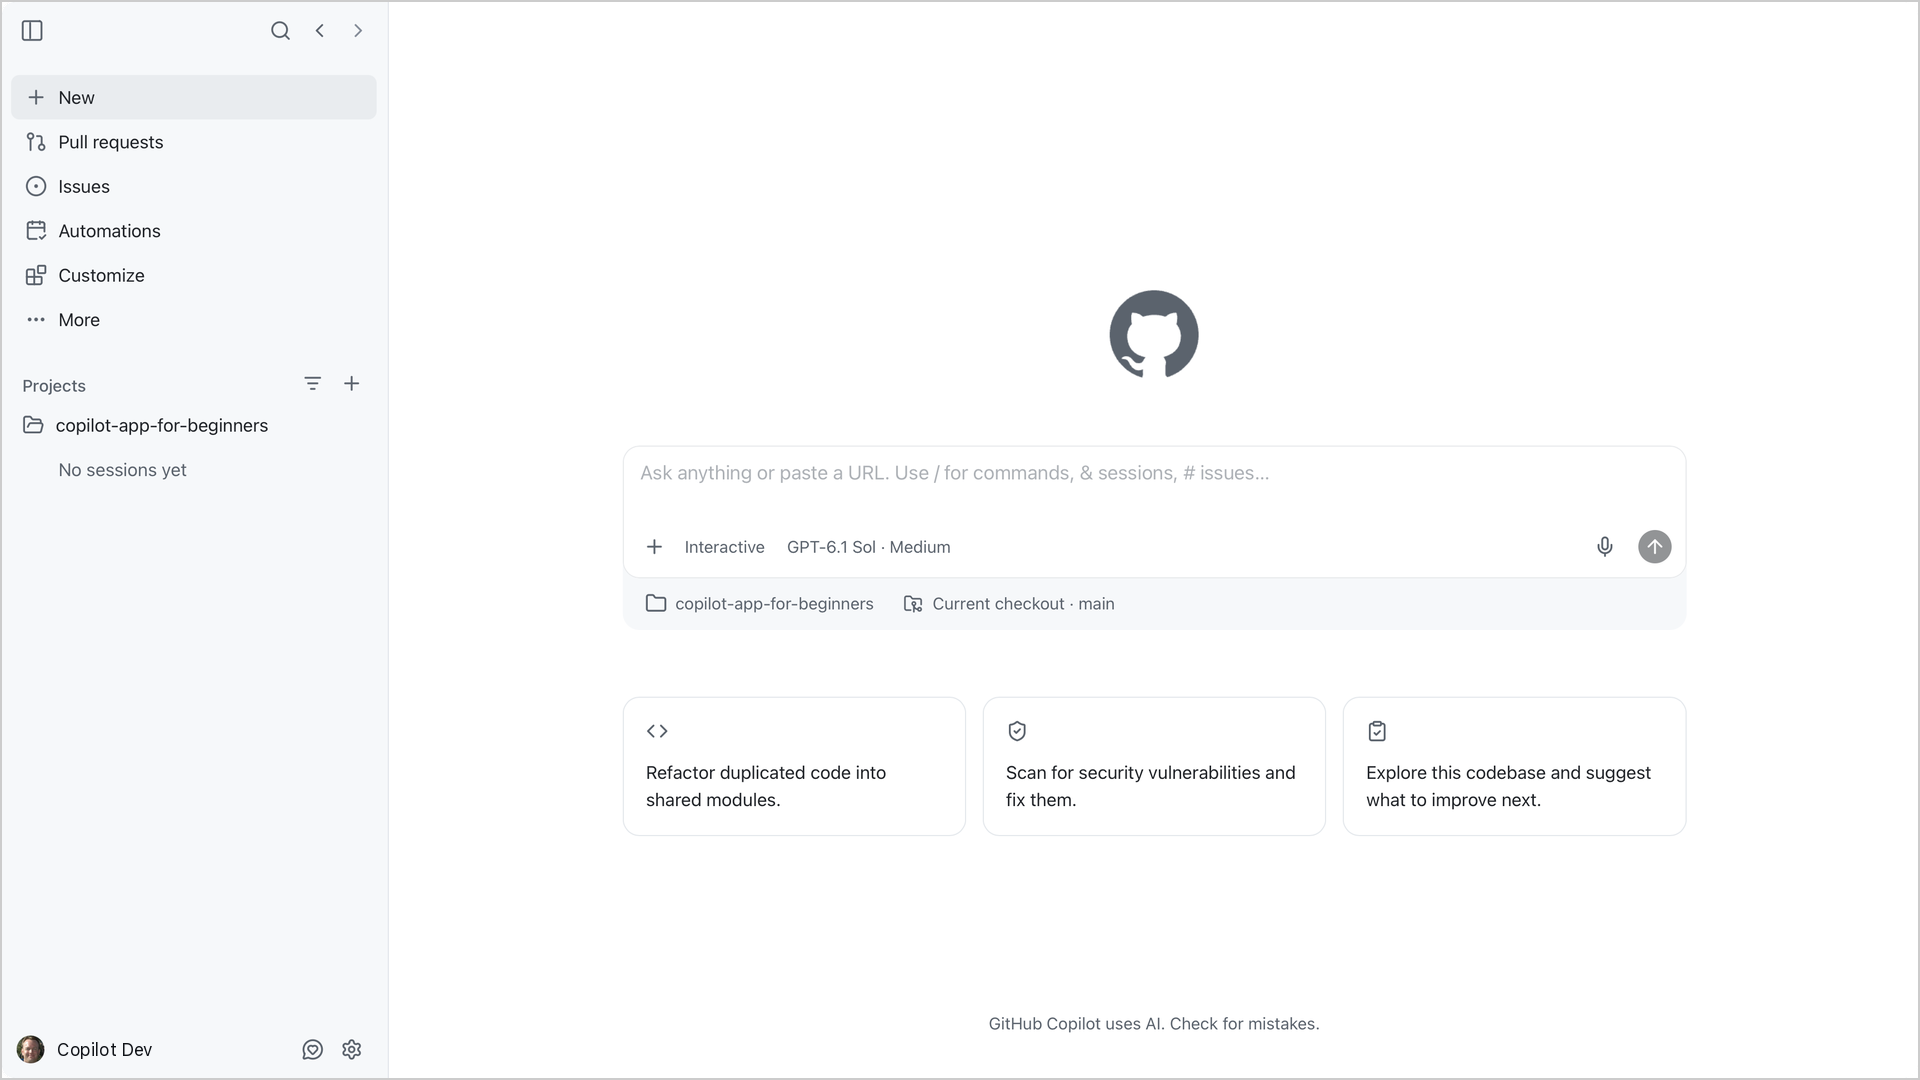
New
This is the landing view. You can start a chat without a project, select a connected project for a project session, choose a mode and model, or start from one of the suggested prompts.
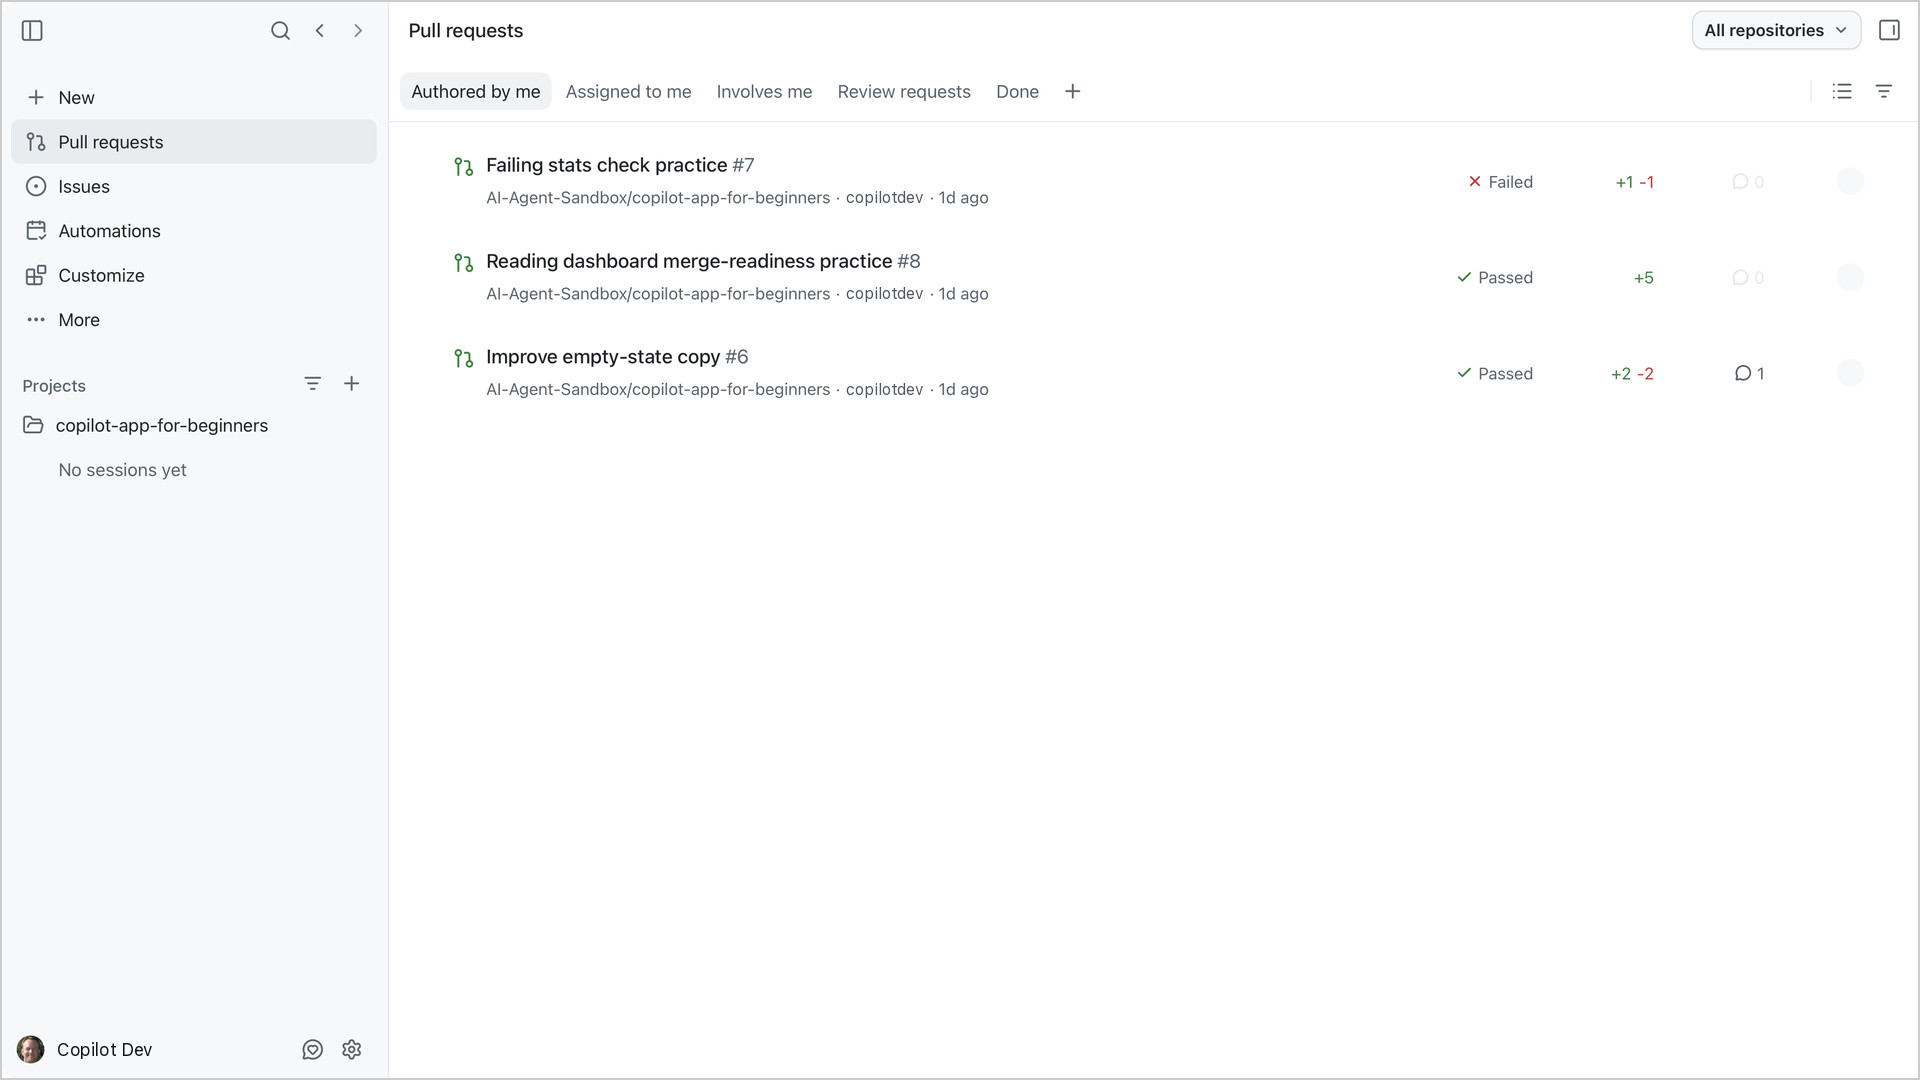
Pull requests
This view lists the GitHub pull requests that involve you. Tabs such as Authored by me and Review requests filter the list, and the All repositories picker narrows it to one repository. Open a pull request to read its checks and comments, or start a session to work on it. The practice pull requests created during the setup chapter appear on the Authored by me tab.
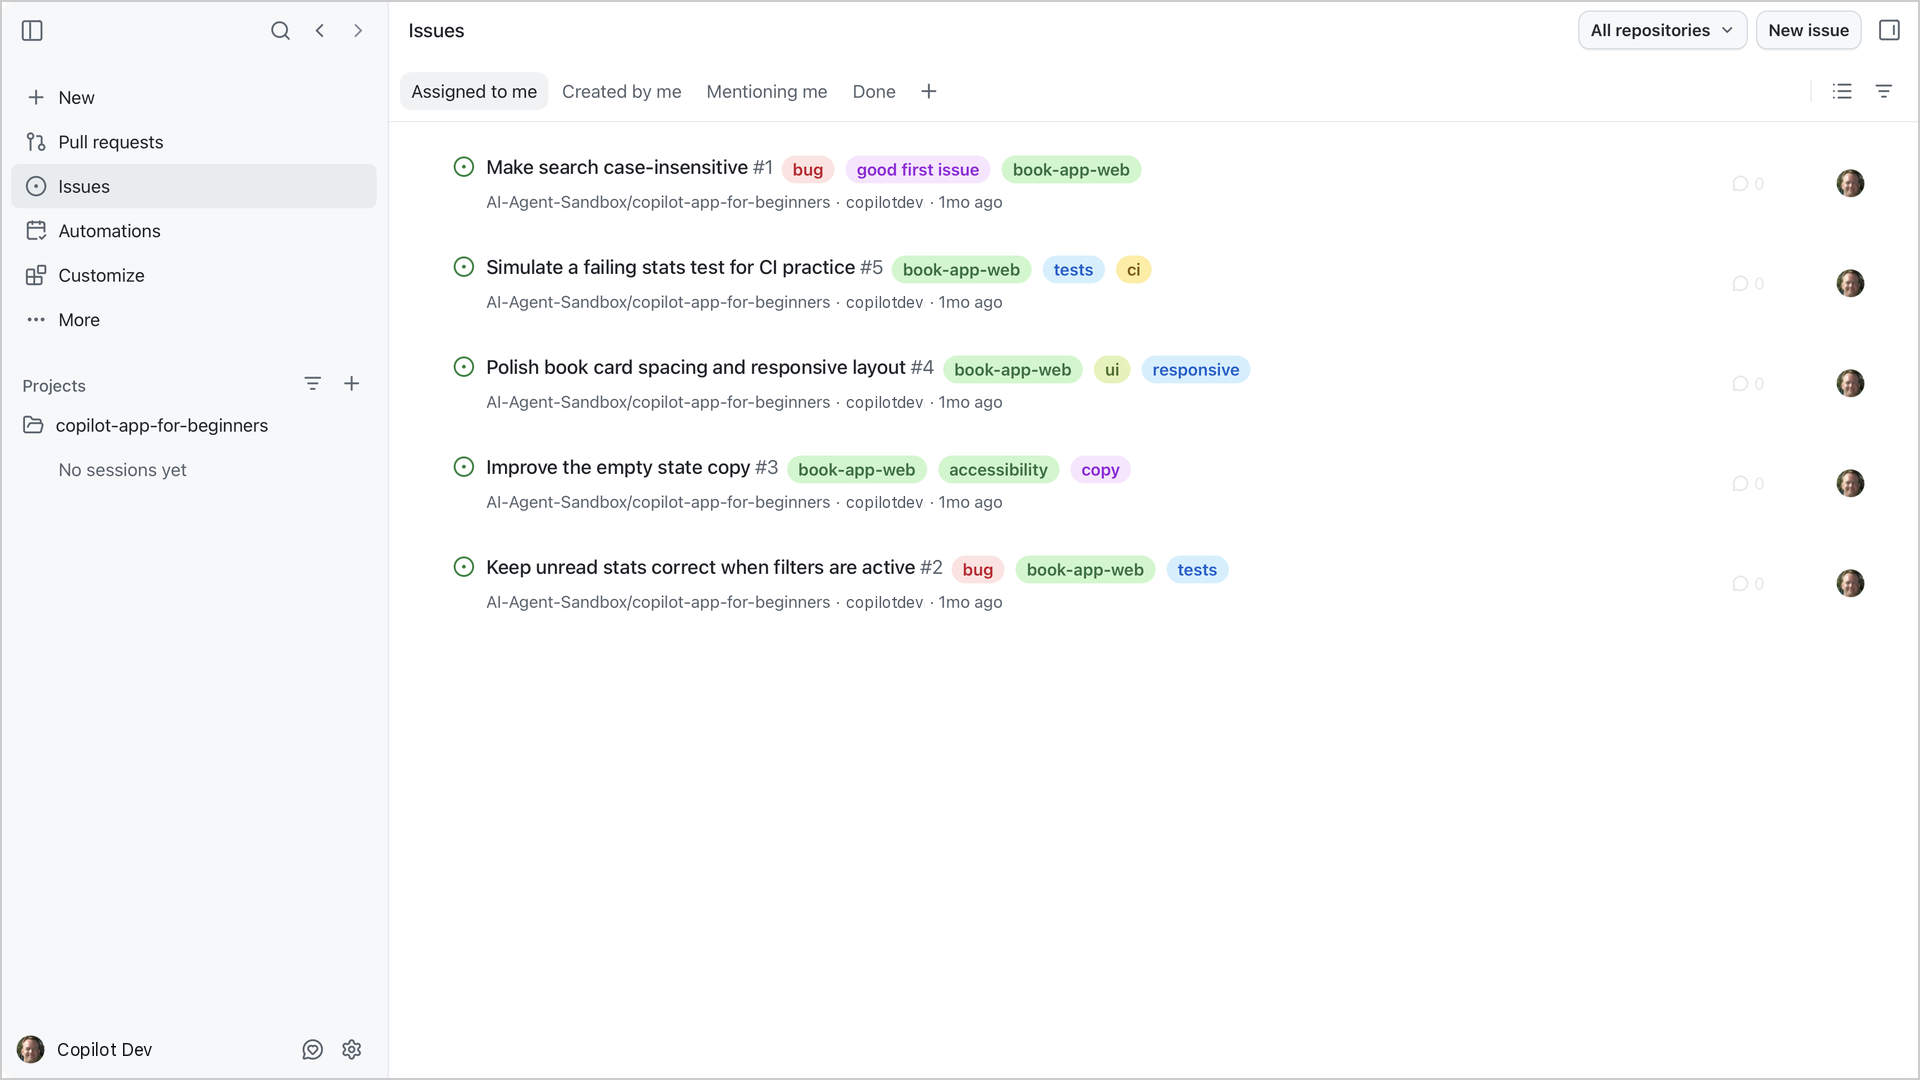
Issues
This view works the same way for GitHub issues, with tabs such as Assigned to me and Created by me. You can start a session from an issue, or select New issue to create one. The practice issues created during setup are assigned to you, so they appear on the Assigned to me tab.
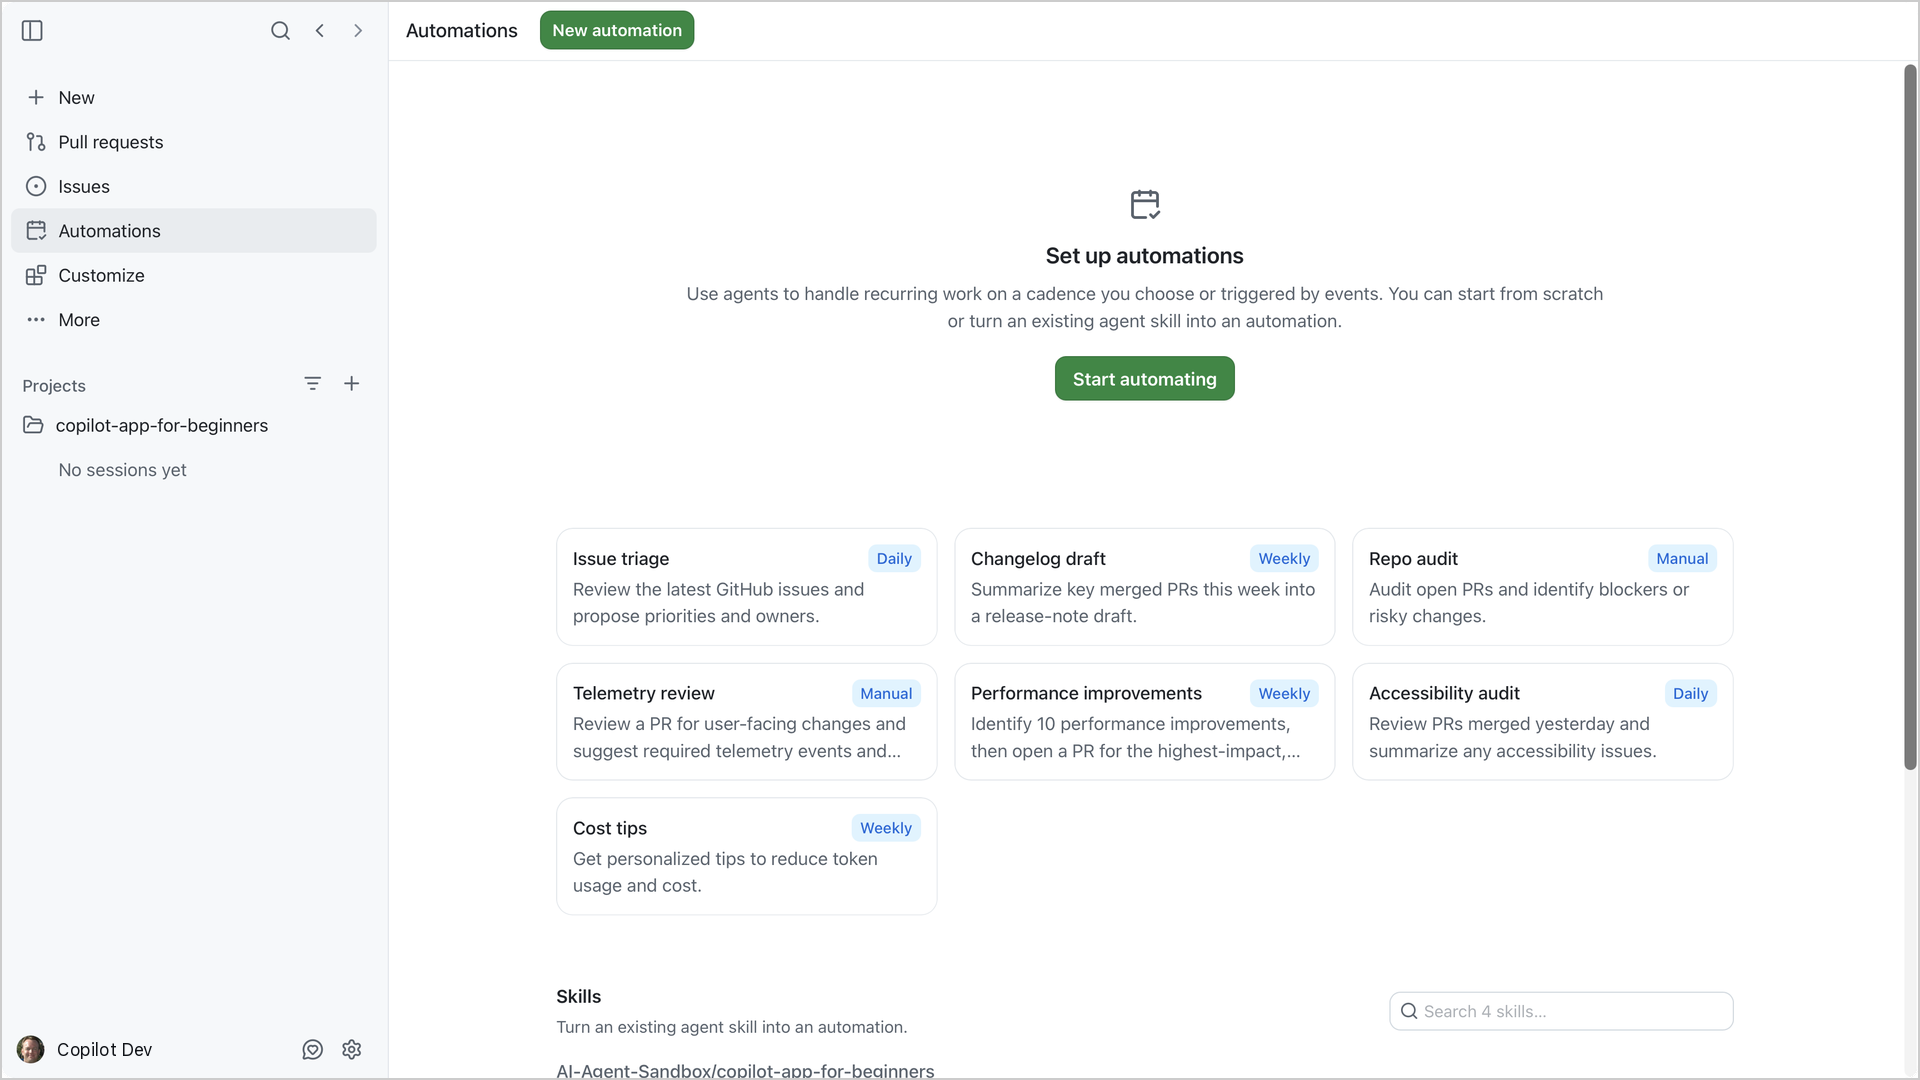
Automations
The Automations view is where you create recurring agent tasks. The view shows templates that can run manually or on a daily or weekly cadence. Automations can also be triggered by events. You choose local or cloud execution when you configure an automation. Chapter 07 covers automations.
Customize
This is where you manage the ways to extend the app: skills, Model Context Protocol (MCP) servers, plugins, extensions, and canvases. You don’t need any of them yet. Chapter 04 covers skills and custom agents, Chapter 05 covers MCP servers and plugins, and Chapter 06 introduces canvases.
More
Select More, then Edit sidebar… to choose which of these views appear in the sidebar. This course uses all of them, so keep them visible.
Projects and Chats
The Projects area of the sidebar lists each connected project. After you start your first chat, a Chats row also appears there. The next section explains when to use a chat and when to use a project session.
Chats, Project Sessions, and Modes
From the Studio: In the Control Room
A producer in the control room doesn’t handle every song the same way. Some quick questions just need a fast answer. Some instrument takes need close direction. Some need the arrangement charted out first.
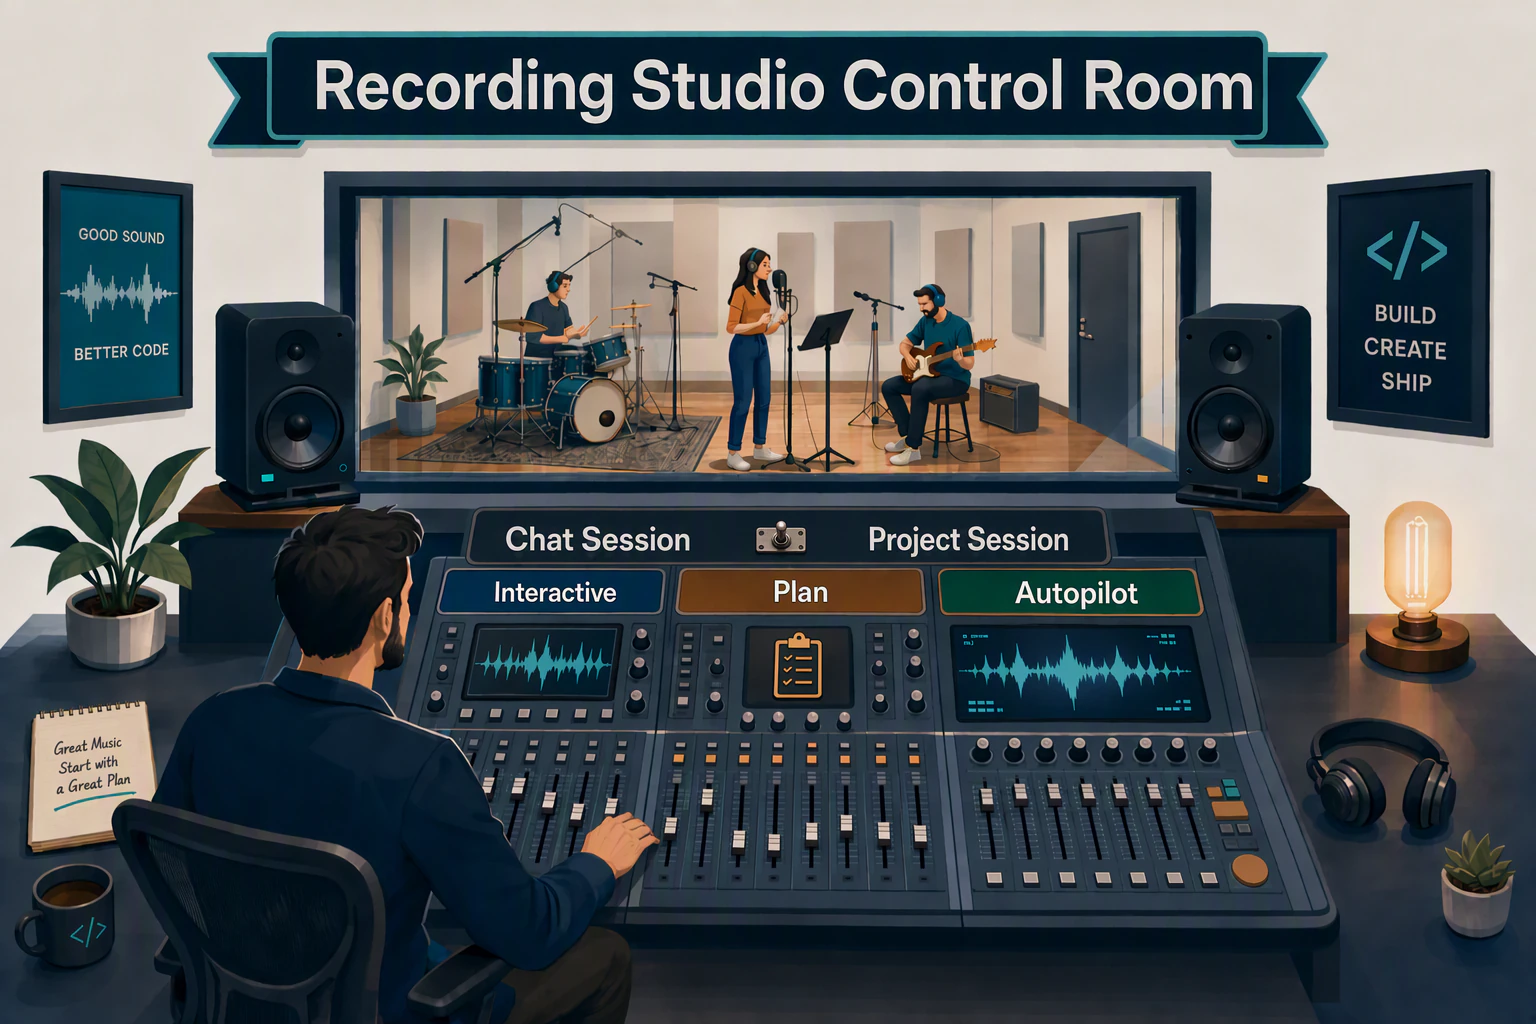
The GitHub Copilot app works the same way. First you choose the kind of session. Then you choose a mode for how closely you direct the work.
| Use this | When you’re trying to… | Creates branch or worktree? |
|---|---|---|
| Chat session | Ask questions, brainstorm, summarize, orient yourself | No |
| Project session | Plan, inspect, edit, test, or create PR-ready work | Usually yes, depending on session settings |
Chat Sessions
A chat is like asking a musician a quick question.
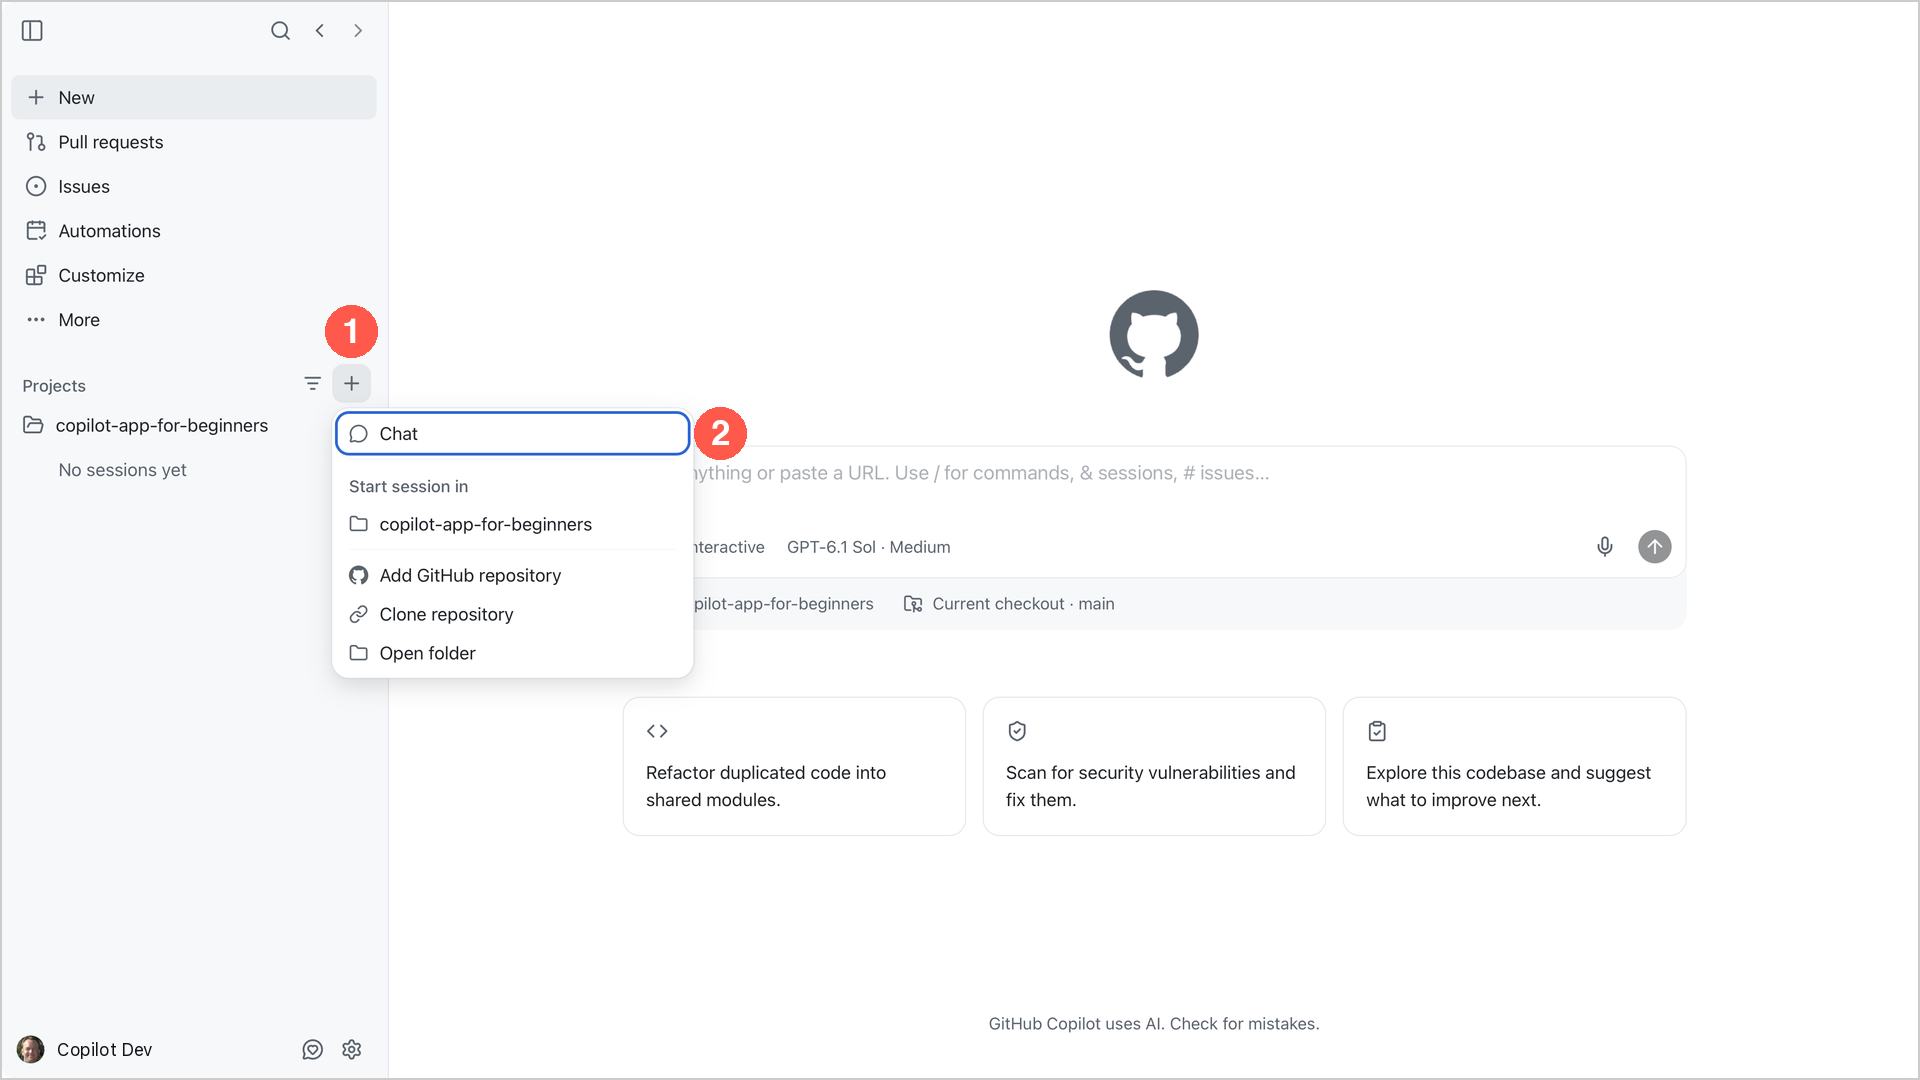
Chat sessions help you learn and brainstorm without starting a branch. They are useful for general questions before you choose a repository. Try it:
-
Select + next to Projects, then select Chat.
-
Confirm that the project picker below the prompt box shows Chat.
-
Submit the prompt below:
In the GitHub Copilot app, explain when I should use a chat and when I should use a project session. Do not create or change files.
Expected Output: The app should explain that chats are useful for general questions and that project sessions provide repository context for code work. It should not change any files, and the app does not create a branch or worktree for a chat.
Project Sessions
Use a project session when the agent needs repository context, needs to change code, or must create an artifact such as a pull request. Most project sessions should use a New worktree. Separate worktrees let agents work at the same time without changing the same working copy. The Chapter 00 setup session is an intentional exception because you selected Current checkout for the one-time setup. The app remembers that choice for the next session you start with +, so you will switch back to New worktree in Chapter 02.
Return to the project session you created earlier. It is listed under copilot-app-for-beginners in the sidebar. Submit this prompt:
I'm learning the copilot-app-for-beginners course. Give me a beginner-friendly tour of the samples/book-app-web sample before I begin the hands-on exercises. Explain what the app does, the technologies it uses, how its main files are organized, how data flows through it and what the tests cover. Refer to specific file paths and finish with a suggested reading order. Do not change any files.Expected Output: The app should describe the sample’s purpose, technologies, main files, data flow, and tests. It should refer to paths under samples/book-app-web and leave the files unchanged.
Modes
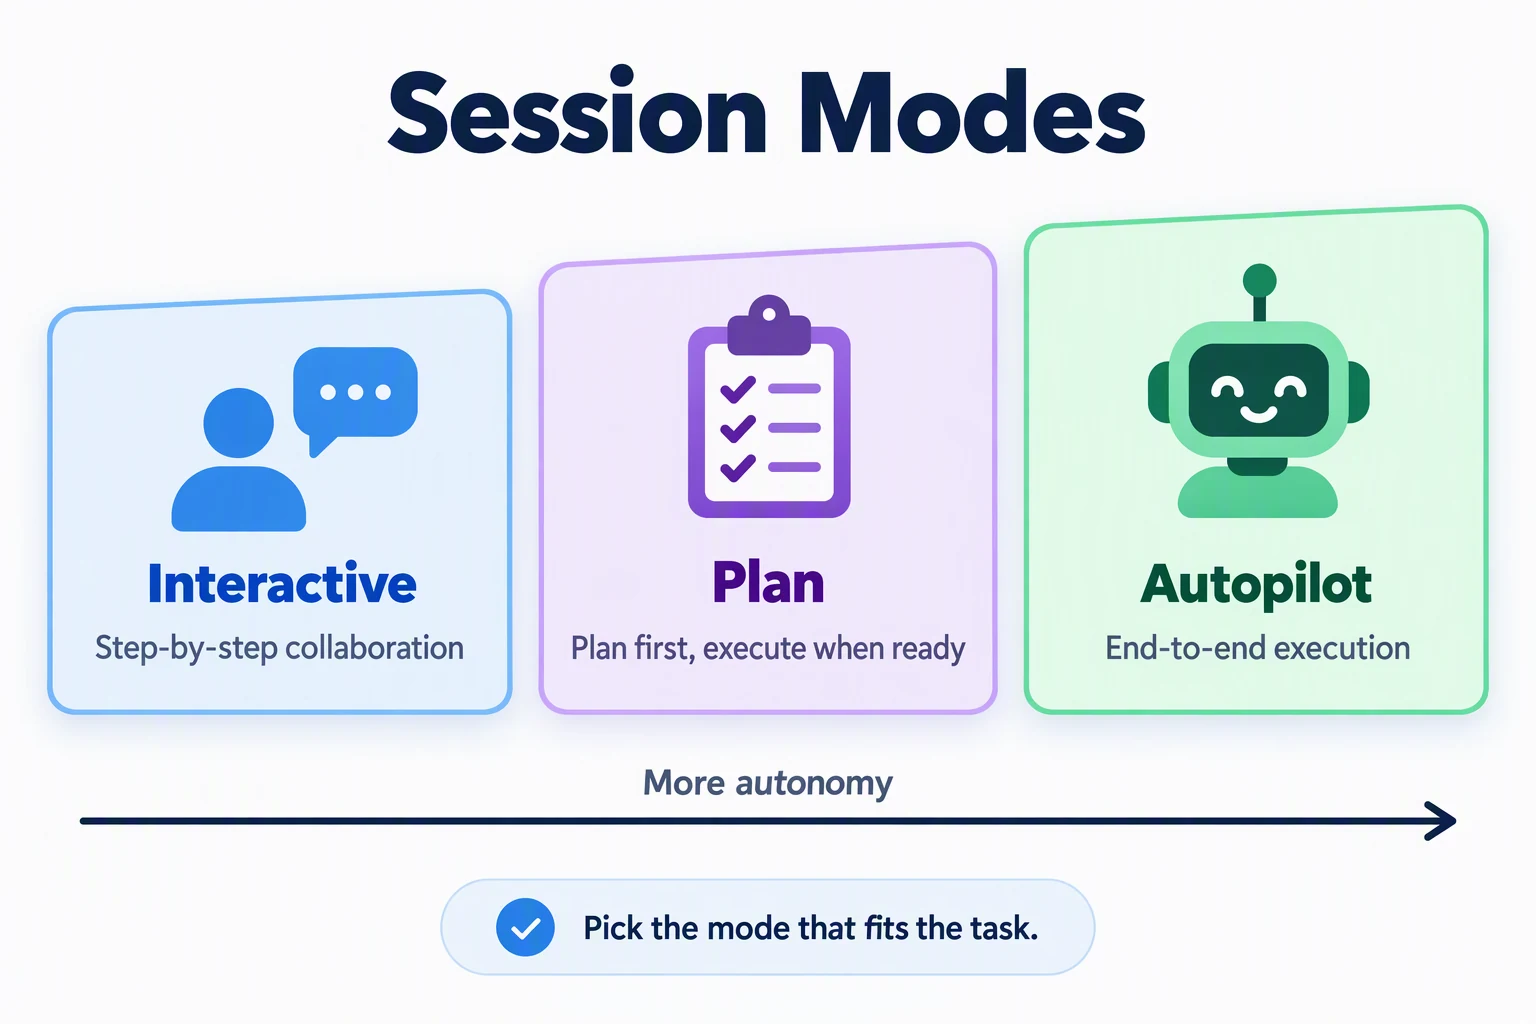
- Interactive mode is like directing an instrument take with frequent check-ins and consistent interactions.
- Plan mode is like charting the arrangement and approving it before the first take.
- Autopilot is like giving a clearly defined task to a trusted system and letting it complete it with minimal intervention.
| Mode | How the app interprets it | Use case |
|---|---|---|
| Interactive | ”Step-by-step collaboration” Copilot works with you step by step | You’d like to be involved throughout the entire process |
| Plan | ”Plan first, execute when ready” Copilot creates a plan before executing | The initial approach and project details matter |
| Autopilot | ”End-to-end execution without interruption” Copilot works independently | Tasks that are well defined and have clear outcomes |
The mode menu also has Tool permissions. This setting controls whether the agent asks you before it uses a tool, such as a terminal command. Always ask asks each time. Approve all runs tools without asking. Assisted asks only when a tool request fails an AI safety check. Check this setting so you know when to expect approval requests.
Models and Reasoning Effort
The session mode controls how independently the agent works. The model and reasoning settings control how it processes your request.
| Control | What it changes |
|---|---|
| Model | The AI model that handles your request. Models differ in capabilities, speed, and usage cost. |
| Reasoning effort | How much reasoning a supported model uses to work through a task. Higher effort can help with complex problems, but can take longer. |
| Context window | How much text the model can hold at once, including the conversation and the files it reads. A larger window can help with long sessions or large codebases, but uses more AI credits. |
The model control is below the prompt box, next to the mode selector. It shows Auto or a model name. Open it to find Model, Effort, and Context window. If the Auto switch is on, these settings are hidden. Turn it off to see them. Some app versions show separate model and reasoning controls.
With Auto, the Copilot app chooses a model for your task. This is different from Autopilot, which controls how independently the agent works.
For a repository tour or a short explanation, keep Auto or the current model and its default reasoning effort. For a difficult bug or a change across several files, consider a model suited to complex coding and a higher effort level. Higher effort does not guarantee a correct answer.
You do not need a specific model for this course. Available models, effort levels, and context window sizes vary. Some models may not offer an effort or context window setting.
Try the Controls
-
Keep the project session open. Select Interactive mode below the prompt box.
-
Open the model control. If you choose a model yourself, use Model to view the choices and select one. For this exercise, you can keep Auto or your current model.
-
If Effort or a separate reasoning control is available, open it and review the levels. Keep the default for this simple question.
-
Submit this prompt:
In samples/book-app-web, explain how filterBooks searches book titles and authors. Does letter case affect the results? Refer to the relevant file. Do not change any files.
Expected Output: The Copilot app should explain that search matches titles and authors without depending on letter case. It should refer to samples/book-app-web/src/App.tsx and leave the files unchanged.
You can change the model and reasoning effort during a session without changing its mode.
Settings
Select the gear icon at the bottom of the sidebar to open Settings. You do not need to change anything now, but it helps to know where each option lives.
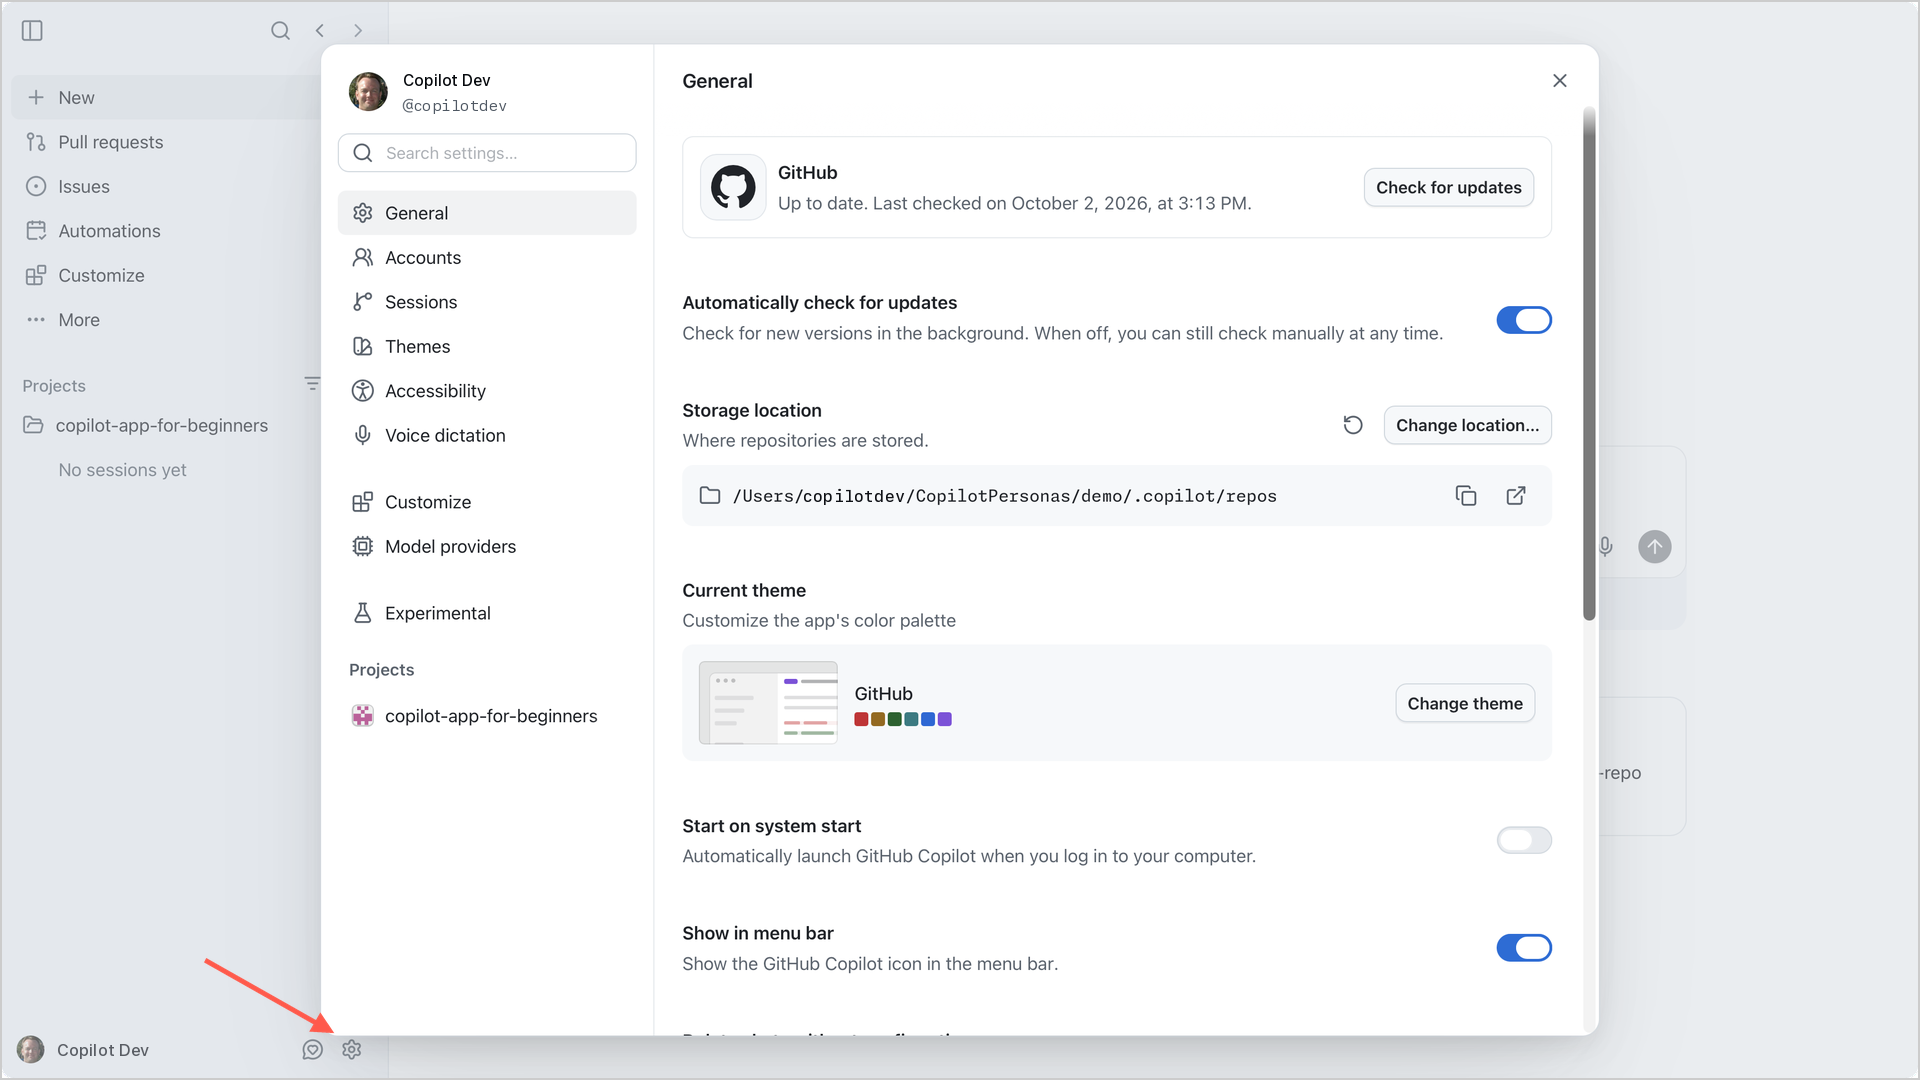
Settings reference: What each area controls
| Setting | What you can do |
|---|---|
| General | - Check for app updates - View or change where repositories are stored - Change the theme and other app preferences |
| Accounts | - View personal and enterprise account information - Add another GitHub account |
| Sessions | - Manage sessions and chats - Set the response style - Set app-wide instructions - Configure branch naming and session behavior |
| Themes | Select and customize the app theme |
| Accessibility | - Display zoom, keyboard shortcuts - Notifications & Announcements |
| Voice dictation | - Microphone settings - Keyboard shortcut setup for activation - Transcription models |
| Customize | Points you to the Customize view in the sidebar, where you manage MCP servers, plugins, skills, and canvases |
| Model providers | Configure custom models from other providers using your own API keys |
| Experimental | Try preview features that can change or be removed |
| Projects | Per-project settings, such as Show in sidebar, sandbox rules, and the default branch |
The Model providers setting connects the app to additional providers. It does not replace the model picker below the prompt box. You do not need to configure a provider for this exercise if a model is already available.
Optional: Voice dictation
Voice dictation turns speech into editable prompt text, which can save time and effort when creating prompts.
Go back to the GitHub Copilot app’s Settings dialog. Select Voice dictation, set up your input device and complete the configuration steps.
Note: Microphone permission is granted at the operating-system level. Follow your operating system prompts to allow the GitHub Copilot app to use the microphone.
- Under Microphone privacy, select Open preferences and ensure the GitHub Copilot app has the necessary permissions to use the microphone.
- Select Test mic to verify that it is working correctly.
- Note the keyboard shortcut for activating voice dictation.
- Exit the Settings dialog and return to the main app window.
- Start a new chat (select + next to Projects, then Chat) and test voice dictation by using the keyboard shortcut.
Troubleshooting
If something does not work as expected, check the problems below. The Troubleshooting Reference lists problems and fixes for all chapters.
First navigation problems
I cannot find a setting shown in the chapter
Settings can vary by app version, operating system, organization policy, and enabled features. Look for the closest matching category, then check the official docs if the screen still does not match.
Voice dictation does not work
Check microphone permission, local transcription model download status, shortcut conflicts, and language support.
A mode or model option is missing
Check your plan, organization policy, project settings, and app version.
Key Takeaways
- Keep your editor for deep coding. Open the GitHub Copilot app when agent work needs a clearer place to run and review, and jump back to your editor any time.
- The app is organized around work surfaces: New for starting work, Pull requests and Issues for GitHub items, Automations for repeatable tasks, Customize for extending the app, and Projects for chats and sessions.
- Chat sessions are for exploration. Project sessions are for focused repository work. Automations are for repeatable agent runs.
- Interactive, Plan, and Autopilot change the level of autonomy.
- Choose the model and reasoning effort below the prompt box. Keep the defaults for simple tasks; consider higher effort for complex work.
What’s Next
In the next chapter, you’ll solve the “shared working copy” challenge from this chapter: isolated sessions with worktrees, plus focused context with @, #, and /.
← Back to Chapter 00 | Continue to Chapter 02 →